Content Menu
● What Is A Washable K&N Air Filter?
● Why Cleaning Your Washable Air Filter Matters
● When To Clean A K&N Washable Air Filter
● Tools And Materials Needed
● Step 1: Safely Remove The Washable Air Filter
● Step 2: Inspect The Washable Air Filter And Housing
● Step 3: Apply Cleaner To The Washable Air Filter
● Step 4: Rinse The Washable Air Filter Correctly
● Step 5: Let The Washable Air Filter Dry Naturally
● Step 6: Re-Oil The K&N Washable Air Filter
● Step 7: Reinstall The Washable Air Filter
● Common Mistakes To Avoid When Cleaning A Washable Air Filter
● Long-Term Maintenance Tips For Your Washable Air Filter
● Environmental And Cost Benefits Of A Washable Air Filter
● Summary Of The Cleaning Process
● Conclusion
● FAQ About K&N Washable Air Filters
>> 1. How often should I clean my K&N washable air filter?
>> 2. Can I use household soap or other cleaners on my washable air filter?
>> 3. What happens if I use too much oil on the washable air filter?
>> 4. Is it safe to drive without an air filter while my washable air filter is drying?
>> 5. Will a K&N washable air filter always increase horsepower?
● Citations:
A K&N washable air filter is built to be cleaned and reused, so learning the correct cleaning process is essential for keeping your engine protected and breathing freely. A properly serviced washable air filter helps maintain airflow, reliability, and long-term cost savings.
What Is A Washable K&N Air Filter?
A K&N washable air filter is a high-flow performance air filter that uses layers of cotton gauze or synthetic media treated with special oil and supported by a wire mesh frame. This design allows the washable air filter to capture fine particles while still providing good airflow, and it can be reused many times through proper cleaning and re-oiling.
Unlike disposable paper filters that must be thrown away when dirty, a washable air filter is designed for repeated service over the life of a vehicle. With the correct cleaner and oil, a K&N washable air filter can be restored to near-new condition many times, reducing waste and total maintenance costs.
Why Cleaning Your Washable Air Filter Matters
Over time, dust, pollen, and road debris accumulate in the pleats of the washable air filter, gradually restricting airflow to the engine. When the washable air filter becomes heavily clogged, the engine must work harder to pull in air, which can lead to reduced performance and efficiency.
Regular cleaning of a washable air filter restores airflow, helps maintain smoother throttle response, and supports more consistent fuel economy. It also ensures that the filter continues to trap dirt effectively, protecting internal engine components from abrasive particles that can cause premature wear.
When To Clean A K&N Washable Air Filter
Manufacturers often recommend cleaning a K&N washable air filter when there is a visible, even layer of dirt over most of the filter surface, rather than strictly following a fixed mileage figure. Under typical driving conditions, this might occur every few tens of thousands of miles, but severe conditions such as dusty roads, off-road use, or heavy traffic in polluted areas can require more frequent service.
A good habit is to visually inspect the washable air filter at each oil change or major service. If the pleats appear uniformly dark and dirty, or if the filter surface is coated with dust and debris, it is time to perform a full clean, dry, and re-oil cycle. Avoid cleaning too frequently when the washable air filter still looks relatively clean, as unnecessary handling and chemical use provide little benefit.
Tools And Materials Needed
Before starting, make sure you have the correct products and a suitable work area. Proper tools help you maintain the washable air filter without damaging it.
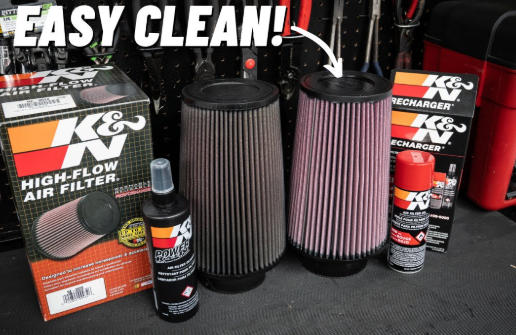
- K&N Air Filter Cleaner or an approved equivalent cleaner designed specifically for oiled cotton or synthetic performance filters.
- K&N filter oil in either squeeze bottle or aerosol form.
- A source of cool, low-pressure water, such as a garden hose with a gentle stream or a tap.
- Basic hand tools (if needed) to open the airbox or intake housing.
- Clean gloves and a cloth for handling parts and wiping the housing.
- A clean, dust-free area where the washable air filter can air-dry completely.
Using approved cleaner and oil is important because harsh chemicals or the wrong type of oil can damage the filter media and compromise the washable air filter's performance.
Step 1: Safely Remove The Washable Air Filter
Begin by turning off the engine and allowing it to cool. Open the hood and locate the airbox or intake housing, which usually holds the engine's primary air filter. Depending on your vehicle, the cover may be secured with clips, screws, or clamps.
Carefully release or remove the fasteners and lift the airbox lid or intake cover. Take note of how the washable air filter is seated, including its orientation and which side faces the incoming air. Gently lift the K&N washable air filter out of the housing, avoiding contact with dirt that may fall into the airbox. Tap the filter lightly to shake off large loose debris, but do not strike it hard or bend the frame.
Step 2: Inspect The Washable Air Filter And Housing
With the washable air filter removed, look over the pleats and frame. Check for any signs of damage such as tears, holes, cracked rubber sealing edges, or distorted pleats. If the washable air filter is damaged, replacement is safer than cleaning.
Next, inspect the inside of the airbox or intake tube. Wipe away loose dirt or debris with a clean cloth, making sure that nothing can be sucked into the engine when the system is reassembled. A clean housing helps your washable air filter work efficiently and reduces the chance of airborne debris bypassing the filter during reinstallation.
Step 3: Apply Cleaner To The Washable Air Filter
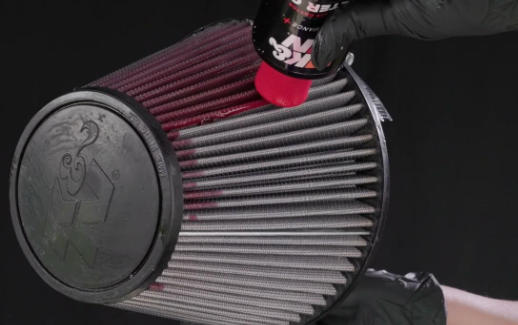
Place the washable air filter in a sink, tray, or another area where you can contain the runoff. Spray K&N Air Filter Cleaner generously onto the dirty side of the filter, making sure to cover each pleat thoroughly. Then spray the clean side as well so the cleaner penetrates completely through the media.
Allow the cleaner to soak into the washable air filter for several minutes, usually around ten minutes as recommended by the product instructions. The cleaner breaks down the old oil and loosens embedded dirt. Do not allow the cleaner to dry on the filter, as this can reduce its effectiveness and make rinsing more difficult.
Step 4: Rinse The Washable Air Filter Correctly
After the soaking time has passed, begin rinsing the washable air filter with cool, low-pressure water. Always rinse from the clean side toward the dirty side so that dirt is pushed out in the direction it originally entered. This technique helps prevent particles from being forced deeper into the media.
Continue rinsing the washable air filter slowly and evenly until the water running off appears clear and free of visible debris. If the filter still looks dirty, you can reapply cleaner, let it soak again, and rinse once more. Avoid using high-pressure nozzles or pressure washers, as they can damage the fibers and create holes that allow unfiltered air into the engine.
Step 5: Let The Washable Air Filter Dry Naturally
Once rinsing is complete and the water runs clear, gently shake the washable air filter to remove excess water, but do not twist or wring it. Place the filter in a well-ventilated indoor or shaded area where air can circulate around it.
Allow the washable air filter to air-dry completely. Depending on temperature and airflow, this may take several hours. Do not use hair dryers, ovens, direct heaters, or intense sunlight to speed up drying, because excessive heat can warp the frame or damage the filter media. The washable air filter must be fully dry before you apply new oil.
Step 6: Re-Oil The K&N Washable Air Filter
When the washable air filter is completely dry, it is time to apply fresh oil. Shake the oil container if required by the instructions, then hold the bottle or spray nozzle close to the crowns of the pleats on the “dirty” side of the filter.
For a squeeze bottle, apply a continuous, thin bead of oil along the top of each pleat across the length of the washable air filter. For an aerosol, spray an even line or light mist along the pleat tops from the recommended distance. The goal is to apply just enough oil so that it can wick through the cotton gauze and create a uniform, slightly colored appearance.
After the initial application, allow the washable air filter to sit for around twenty minutes so the oil can spread throughout the media. Then inspect the filter carefully. If you see light-colored spots where oil has not fully wicked, lightly touch up only those areas with a small amount of additional oil. Avoid over-oiling, as too much oil can restrict airflow and may contaminate sensitive engine sensors.
Step 7: Reinstall The Washable Air Filter
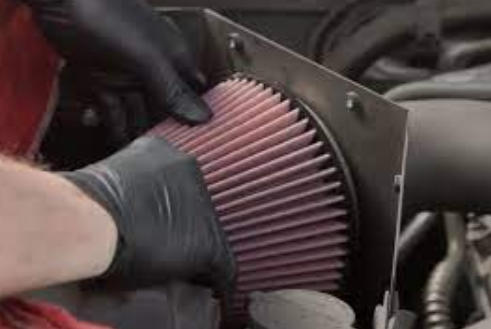
Once the washable air filter is evenly oiled and there are no drips or heavily saturated areas, return to the vehicle. Place the filter back into the airbox or intake housing in the same orientation as before, ensuring that the sealing lip sits correctly in the groove or frame.
Reinstall the airbox lid or intake cover, making sure it closes fully and clamps, clips, or screws are secure. Check around the edges to confirm that there are no gaps where unfiltered air might bypass the washable air filter. Finally, look around the engine bay to confirm that no tools or rags have been left behind before closing the hood.
Common Mistakes To Avoid When Cleaning A Washable Air Filter
Even though the process is straightforward, several mistakes can affect the performance and lifespan of a washable air filter:
- Using unapproved cleaners. Strong solvents, gasoline, household degreasers, or dish soap can damage the cotton or synthetic media and rubber parts of a washable air filter.
- Applying excessive oil. Too much oil can soak the filter and potentially reach the mass airflow sensor, leading to rough running or error codes.
- Using high-pressure water or compressed air directly on the media. Excessive force can tear fibers or create tiny holes that let unfiltered dirt pass through.
- Reinstalling the washable air filter while it is still damp. Moisture trapped in the filter can restrict airflow and may promote corrosion or mold in extreme cases.
- Ignoring visible damage. A washable air filter with torn media, cracked frames, or missing sections should be replaced, not cleaned and reused.
By avoiding these errors, you help ensure that your washable air filter continues to perform properly with each cleaning cycle.
Long-Term Maintenance Tips For Your Washable Air Filter
To get the most from a K&N washable air filter, integrate it into your routine maintenance plan:
- Inspect the washable air filter regularly, especially if you drive in dusty or severe conditions.
- Record cleaning dates and mileage in a log or phone note so you can track intervals.
- Store cleaning and oiling products together so they are easy to find when it is time for service.
- If your vehicle is mission-critical or frequently used, consider having a second washable air filter so one can be installed while the other is being cleaned and dried.
These habits help keep the washable air filter effective over many years, maximizing both performance and cost advantages.
Environmental And Cost Benefits Of A Washable Air Filter
A reusable, washable air filter offers clear environmental advantages over disposable paper elements. Because one washable air filter can replace many conventional filters over its lifetime, fewer materials are manufactured, shipped, and ultimately sent to landfills.
From a financial perspective, the initial investment in a quality K&N washable air filter and cleaning kit is offset by reducing the number of replacements you must purchase. The more you drive and the longer you keep the vehicle, the greater the total savings from maintaining a washable air filter rather than discarding filters at each service.
Summary Of The Cleaning Process
The essential steps for cleaning a K&N washable air filter can be summarized as follows:
1. Remove the washable air filter from the airbox or intake housing.
2. Inspect the filter and housing, and lightly tap off loose debris.
3. Spray the washable air filter thoroughly with approved cleaner and let it soak.
4. Rinse from the clean side to the dirty side using cool, low-pressure water until the water runs clear.
5. Allow the washable air filter to air-dry completely in a well-ventilated area.
6. Apply filter oil evenly along each pleat, then let it wick and touch up any light spots.
7. Reinstall the washable air filter carefully, making sure it seals properly.
Following these steps at sensible intervals keeps your washable air filter functioning as designed and helps maintain consistent engine performance.
Conclusion
Cleaning a K&N washable air filter is a simple but important maintenance task that protects your engine, preserves airflow, and reduces long-term operating costs. By using the correct cleaner and oil, rinsing gently from the clean side out, allowing full drying time, and re-oiling with care, you can restore your washable air filter to effective working condition many times over the life of your vehicle.
A well-maintained washable air filter supports smoother throttle response, more stable fuel economy, and better protection against dust and debris compared with a neglected or clogged filter. Integrating this service into your regular maintenance schedule turns the washable air filter into a long-term asset rather than just another part that needs continuous replacement.
FAQ About K&N Washable Air Filters
1. How often should I clean my K&N washable air filter?
In general, you should clean a K&N washable air filter when there is a visible, even layer of dirt across the pleats rather than at a fixed mileage number. Under normal driving conditions, this might be after many thousands of miles, but frequent inspections are important if you drive in dusty or harsh environments.
2. Can I use household soap or other cleaners on my washable air filter?
It is not recommended to use household soap, strong degreasers, or other general-purpose cleaners on a washable air filter. These products can break down the cotton or synthetic media and rubber components. For best results and to protect the filter, always use the dedicated cleaner specified by the manufacturer.
3. What happens if I use too much oil on the washable air filter?
If you apply too much oil to a washable air filter, the excess can restrict airflow and may be drawn into the intake system. In some vehicles, this can contaminate the mass airflow sensor, causing drivability problems or warning lights. Always apply a thin, even line of oil, allow it to wick into the media, and only add small amounts to any light spots.
4. Is it safe to drive without an air filter while my washable air filter is drying?
Driving without an air filter is not safe for the engine because unfiltered air can carry dust and debris directly into the combustion chambers. Always wait until your washable air filter is completely dry, correctly oiled, and reinstalled before driving. If necessary, keep a spare filter to use while the washable air filter is drying.
5. Will a K&N washable air filter always increase horsepower?
A clean K&N washable air filter can help maintain or slightly improve airflow compared with a clogged paper filter, which may support better throttle response and smooth performance. However, actual horsepower gains depend on the specific vehicle and intake system and are often modest. The main benefits of a washable air filter are reusability, consistent airflow, and reduced waste.
Citations:
[1](https://www.knfilters.com/cleaning)
[2](https://www.knglobalfiltration.com/how-to-clean-your-industrial-air-filter-2/)
[3](https://www.knfilters.com/blog/how-to-clean-your-new-kn-lifetime-washable-home-air-filter/)
[4](https://www.youtube.com/watch?v=pohkTM6jaDs)
[5](https://www.autozone.com/diy/air-intake/how-to-clean-reusable-car-air-filter)
[6](https://www.reddit.com/r/Autos/comments/hawyv/how_to_clean_a_kn_air_filter/)
[7](https://www.youtube.com/watch?v=WX6CedJwGJ0)
[8](https://www.facebook.com/groups/234274037153092/posts/1732380790675735/)
[9](https://www.facebook.com/KNFilters/videos/kn-home-air-filter-cleaning-instructions/342073070097967/)


