Content Menu
● Understanding Philips HEPA Air Filter Design
● Can You Wash a Philips HEPA Air Filter?
● Step‑by‑Step: Cleaning the Pre‑Filter and Housing
>> 1. Turn Off and Unplug
>> 2. Open the Filter Compartment
>> 3. Remove the Pre‑Filter
● Dry Cleaning a Non‑Washable Philips HEPA Air Filter
>> 1. Visual Inspection and Indicator Check
>> 2. Gentle Surface Dust Removal
● Wet Cleaning for Washable Philips HEPA Air Filters
>> 1. Preparation
>> 2. Rinsing and Gentle Washing
>> 3. Complete Air‑Drying
● Reinstalling the HEPA Air Filter and Resetting the Purifier
● How Often to Clean and Replace Philips HEPA Air Filters
● Extra Tips to Maximize HEPA Air Filter Performance
● Conclusion
● FAQ
>> 1. Can I wash the HEPA Air Filter in my Philips purifier?
>> 2. How often should I clean the pre‑filter to protect the HEPA Air Filter?
>> 3. When do I need to replace the HEPA Air Filter?
>> 4. Is it safe to vacuum a Philips HEPA Air Filter?
>> 5. What happens if I reinstall a damp HEPA Air Filter?
● Citations:
Keeping the HEPA Air Filter in a Philips air purifier clean (and replacing it at the right time) is essential for stable airflow, effective particle removal, and long-term protection of indoor air quality. For most Philips units, only the pre-filter is washable, while the HEPA Air Filter itself is not washable and must be replaced when the filter indicator tells you to.[1][2][3][4]
Understanding Philips HEPA Air Filter Design
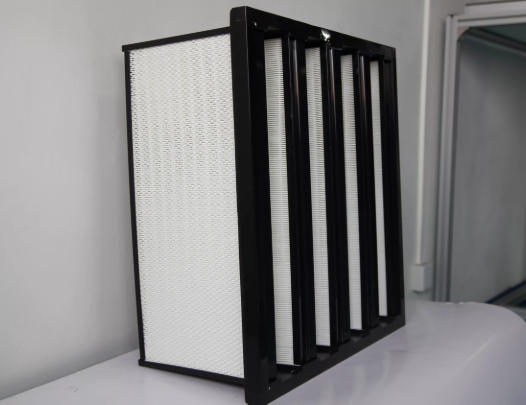
A Philips HEPA Air Filter is made from ultra‑fine fibers that trap particles as small as 0.3 microns, including dust, pollen, smoke, and many bacteria. This delicate structure is what gives a HEPA Air Filter its high efficiency, but it is also the reason most HEPA layers cannot tolerate water, squeezing, or aggressive brushing without damage.[7][6][8]
Many Philips purifiers combine several stages in one cartridge:
- A washable pre-filter that stops larger dust and hair before they reach the HEPA Air Filter.[2][3][1]
- A HEPA Air Filter that captures fine particles and allergens and often works together with an activated carbon layer.[6][7]
- An optional carbon layer for odors and VOCs, which usually needs periodic replacement rather than washing.[9][7]
For most NanoProtect HEPA Air Filter cartridges, Philips clearly states that they are not washable and must be replaced when the device indicates.[4][1][2]
Can You Wash a Philips HEPA Air Filter?
Whether you can wash a HEPA Air Filter in a Philips air purifier depends entirely on the model and the filter label.[1][5]
- Standard NanoProtect HEPA Air Filter:
- Marked as non‑washable; water breaks the fiber structure and reduces filtration performance.[7][4][1]
- Recommended care is limited to gentle dry cleaning (mainly vacuuming surface dust) and timely replacement when the filter light comes on.[3][7]
- Special “washable” HEPA Air Filter types:
- Some Philips models or compatible filters specify that the HEPA Air Filter can be rinsed under lukewarm water as part of maintenance.[5][6]
- Even for washable variants, manufacturers emphasize gentle rinsing, no soaking, and complete air‑drying (24 hours or more) before reuse.[5]
If your HEPA Air Filter has no clear “washable” marking and the user manual doesn't explicitly approve water, treat it as a non‑washable HEPA Air Filter and never expose it to moisture.[1][7]
Step‑by‑Step: Cleaning the Pre‑Filter and Housing
In a Philips HEPA Air Filter air purifier, the pre‑filter and internal housing are the primary parts you clean regularly, because this step directly protects the HEPA Air Filter and extends its life.[2][3][1]
1. Turn Off and Unplug
Before touching any HEPA Air Filter or pre‑filter:
- Switch off the air purifier using the power button and unplug it from the wall socket.[10][8][11]
- Move the unit to a stable surface, ideally in a well‑ventilated area to prevent dust from spreading indoors.[9][5]
This protects internal electronics and avoids accidental shock while you handle the HEPA Air Filter module.[8]
2. Open the Filter Compartment
To access the HEPA Air Filter and pre‑filter:
- Release the front or rear panel latch according to your model (for example, some Philips Series 3000 units open from the front).[12][5]
- Gently remove the cover and set it aside; some models integrate the pre‑filter into the rear cover as a mesh.[3][2]
Handle the cover and HEPA Air Filter frame carefully so you do not crack plastic clips or deform the filter cartridge.[5]
3. Remove the Pre‑Filter
The pre‑filter is usually a coarse mesh designed to capture hair and larger dust before it reaches the HEPA Air Filter.[2][7][1]
- Unclip or slide out the pre‑filter from the HEPA Air Filter assembly.
- Take the pre‑filter outdoors or over a trash bin and tap it gently to release loose dust.[10][7]
- Use a vacuum cleaner with a soft brush attachment on low suction to remove remaining dust from both sides.[11][10][7]
If the manual allows, you may rinse the pre‑filter under running water:
- Rinse with clean lukewarm water and optionally use a soft brush for stubborn dirt.[10][9]
- Shake off excess water and air‑dry completely before reinstalling, because any moisture reaching the HEPA Air Filter behind it is undesirable.[2][10]
A clean pre‑filter ensures less dust load on the HEPA Air Filter and maintains airflow.[7][1]
Dry Cleaning a Non‑Washable Philips HEPA Air Filter
For a standard non‑washable HEPA Air Filter air purifier Philips, only dry maintenance is recommended. The goal is to remove surface dust without degrading the internal HEPA fibers.[4][1][7]
1. Visual Inspection and Indicator Check
Philips purifiers usually provide a filter status indicator or error code:
- Many models show a filter replacement symbol or codes like C7, or separate icons for pre‑filter, HEPA Air Filter, and carbon filter.[3][4][10]
- When the display shows that the HEPA Air Filter is at end of life, replacement is required, not just cleaning.[10][3]
Before cleaning, note how dirty the HEPA Air Filter looks:
- If the HEPA Air Filter is uniformly dark gray or clogged and the indicator demands replacement, do not attempt deep cleaning; install a new HEPA Air Filter cartridge instead.[7][5]
- If the HEPA Air Filter still has visible white areas with light dust accumulation, gentle surface cleaning can slow down performance loss.[8][5]
2. Gentle Surface Dust Removal
To safely clean a non‑washable HEPA Air Filter:
- Hold the HEPA Air Filter vertically over a bin or outdoors to avoid re‑contaminating the room.[9][5]
- Tap very lightly on the frame (not directly on the pleats) to dislodge loose dust.[8][7]
- Use a vacuum cleaner with a soft brush accessory on low power and vacuum across the pleated face in straight, slow strokes.[11][5][7]
Key precautions for a HEPA Air Filter:
- Do not press the vacuum nozzle hard against the media, which might tear fibers or deform pleats.[5][7]
- Do not use compressed air, as high‑pressure streams can push particles deeper into the HEPA Air Filter or rupture the filter surface.[8][5]
This dry cleaning method helps the HEPA Air Filter maintain airflow and buys some time before final replacement, but it does not reset the filter's cumulative life.[13][5]
Wet Cleaning for Washable Philips HEPA Air Filters
If and only if your manual or the filter label identifies the HEPA Air Filter as washable, you can use a controlled wet cleaning process.[6][1][5]
1. Preparation
For a washable HEPA Air Filter air purifier Philips:
- Confirm washability on the packaging or manual; some Philips models like certain AC series explicitly mention washable HEPA filters.[6][5]
- Prepare lukewarm water, a small amount of mild, fragrance‑free detergent, soft towels, and a drying rack.[5]
Always keep the HEPA Air Filter's frame intact and avoid twisting or bending during washing.[5]
2. Rinsing and Gentle Washing
Washable HEPA Air Filter cleaning is different from soaking clothes:
- Hold the HEPA Air Filter vertically under gently running lukewarm water so gravity carries dust out of the pleats.[9][5]
- Avoid strong jets and never fully submerge the HEPA Air Filter, which can trap water in the inner layers.[5]
If the HEPA Air Filter is heavily soiled:
- Add a small drop of mild dish soap, lightly rub the surface with your fingers, and immediately rinse until the water runs clear.[8][5]
- Do not use harsh chemicals, bleach, or hot water, which can degrade the HEPA Air Filter media and frame.[7][5]
3. Complete Air‑Drying
A washable HEPA Air Filter must dry completely before going back into the Philips purifier:
- Hold the HEPA Air Filter over a sink or towel and gently shake off excess water, without wringing or squeezing the pleats.[5]
- Place the HEPA Air Filter on a clean drying rack in a well‑ventilated area and allow at least 24 hours for full air‑drying.[9][5]
The HEPA Air Filter must feel totally dry inside and out; installing a damp HEPA Air Filter can cause mold, odors, and permanent damage to the purifier.[7][5]
Reinstalling the HEPA Air Filter and Resetting the Purifier
Once the pre‑filter and HEPA Air Filter are ready:
- Insert the HEPA Air Filter back into the Philips purifier, following the airflow arrows and orientation markings on the frame.[3][5]
- Reattach the pre‑filter and cover, ensuring all clips engage correctly so that air cannot bypass the HEPA Air Filter.[2][3]
After assembly:
- Plug in the appliance and power it on, then follow the manual to reset the filter indicator (often by holding the reset or filter button for several seconds).[4][10][3]
- Let the purifier run on a higher fan speed for 10–15 minutes and check for normal airflow, quiet operation, and absence of abnormal smells around the HEPA Air Filter area.[10][5]
A correctly reinstalled HEPA Air Filter will restore clean airflow and allow the device to track filter life from a new baseline.[13][3]
How Often to Clean and Replace Philips HEPA Air Filters
Different environments and usage patterns change how quickly a HEPA Air Filter loads with dust.
Typical maintenance patterns for a HEPA Air Filter air purifier Philips are:
- Pre‑filter cleaning: Every 2–4 weeks, or when the purifier shows a cleaning alert like “F0”.[2][10][7]
- HEPA Air Filter inspection: Every 3–6 months, especially in dusty homes or those with pets and smokers.[8][7][5]
Replacement timing for the HEPA Air Filter:
- Philips often designs HEPA Air Filter cartridges for a certain number of operating hours (for example, around one year of typical use).[13][6][5]
- When the HEPA Air Filter indicator lights up or a specific replacement code appears, the safest approach is to install a new genuine Philips HEPA Air Filter rather than continue cleaning the old one.[4][3]
Using a heavily worn HEPA Air Filter reduces purification efficiency and can stress the fan motor as it struggles against higher resistance.[11][7]
Extra Tips to Maximize HEPA Air Filter Performance
A Philips HEPA Air Filter lasts longer and works more effectively when supported by good habits:
- Place the purifier away from walls and obstacles so air can reach the HEPA Air Filter from all sides, preventing localized clogging.[9][8]
- Keep windows closed during high‑pollution days so the HEPA Air Filter deals with less dust load overall.[11][7]
- Use lower fan speeds in clean environments and boost to higher speeds only when needed, aligning HEPA Air Filter wear with real air quality conditions.[13][5]
For households with asthma patients or pharmaceutical‑grade hygiene requirements, replacing the HEPA Air Filter slightly earlier than the maximum stated life provides an extra safety margin.[6][7]
Conclusion
Cleaning a Philips air purifier correctly means focusing regular maintenance on the pre‑filter and housing while treating the HEPA Air Filter according to its specific type—washable or non‑washable. Non‑washable Philips HEPA Air Filters should only receive gentle dry cleaning and timely replacement when the indicator light appears, while washable variants must be rinsed carefully and dried completely to preserve filtration performance. With proper care, a HEPA Air Filter air purifier Philips can deliver consistently high air quality for homes, clinics, laboratories, and pharmaceutical environments that demand reliable particulate control.[1][3][6][7][5]
FAQ
1. Can I wash the HEPA Air Filter in my Philips purifier?
Most Philips HEPA Air Filters are not washable and must be replaced when the filter replacement indicator comes on. Only models or filters explicitly labeled as washable allow rinsing, and even then the HEPA Air Filter must be air‑dried thoroughly before reinstalling.[1][6][4][7][5]
2. How often should I clean the pre‑filter to protect the HEPA Air Filter?
Philips normally recommends cleaning the pre‑filter about once a month or whenever the cleaning alert appears on the display. Regular pre‑filter care reduces dust load on the HEPA Air Filter, improves airflow, and can delay the need for a new HEPA Air Filter cartridge.[3][1][10][2][7]
3. When do I need to replace the HEPA Air Filter?
You should replace the HEPA Air Filter when the purifier's filter status indicator or dedicated HEPA symbol lights up or flashes red. In typical indoor conditions, a Philips HEPA Air Filter often lasts around a year of standard use, but heavy pollution or continuous operation may shorten this interval.[6][4][13][10][3][5]
4. Is it safe to vacuum a Philips HEPA Air Filter?
Light vacuuming of the outer surface is acceptable for many HEPA Air Filter designs as long as the manual does not forbid it. Always use low suction, a soft brush attachment, and avoid pressing into the pleats so the HEPA Air Filter media is not torn or compressed.[7][8][5]
5. What happens if I reinstall a damp HEPA Air Filter?
Installing a damp HEPA Air Filter can promote mold growth, musty odors, and even damage to the purifier's internal components. To avoid these risks, any washable HEPA Air Filter must be completely dry—usually after 24 hours or more of air‑drying—before it is placed back into the Philips purifier.[9][7][5]
Citations:
[1](https://www.usa.philips.com/c-f/XC000012486/can-i-clean-the-filters-and-pre-filter-of-my-philips-air-purifier)
[2](https://www.philips.com.hk/en/c-f/XC000012486/can-i-clean-the-filters-and-pre-filter-of-my-philips-air-purifier)
[3](https://www.philips.co.uk/c-f/XC000012496/how-and-when-should-i-clean-replace-my-air-purifier-s-filters-and-sensor)
[4](https://www.philips.com.hk/en/c-f/XC000005727/what-filters-should-i-use-with-my-philips-air-purifier)
[5](https://airpurifiersadvisor.com/how-to-clean-hepa-filter-air-purifier-philips/)
[6](https://www.home-appliances.philips/sg/en/p/FY1119_30)
[7](https://www.fortress.com.hk/en/promotion/buying-guides/air-purifier-cleaning)
[8](https://www.eurekaforbes.com/blog/guide-on-how-to-clean-air-purifier-and-filter.html)
[9](https://www.faberspa.com/en-en/blogs/en/air-purifiers-filter-cleaning-and-maintenance)
[10](https://www.youtube.com/watch?v=fA7Qtxqbvis)
[11](https://alen.com/blogs/usage/how-to-clean-air-purifier)
[12](https://www.youtube.com/watch?v=EuAg01FxLks)
[13](https://www.reddit.com/r/AirPurifiers/comments/1gxafr9/does_my_hepa_filter_need_to_be_replaced/)
[14](https://www.youtube.com/watch?v=O9plgLDSRY8)
[15](https://www.youtube.com/watch?v=Roerdn9MzIQ)


